How to Start a WordPress Blog in 2026: Step-by-Step Guide
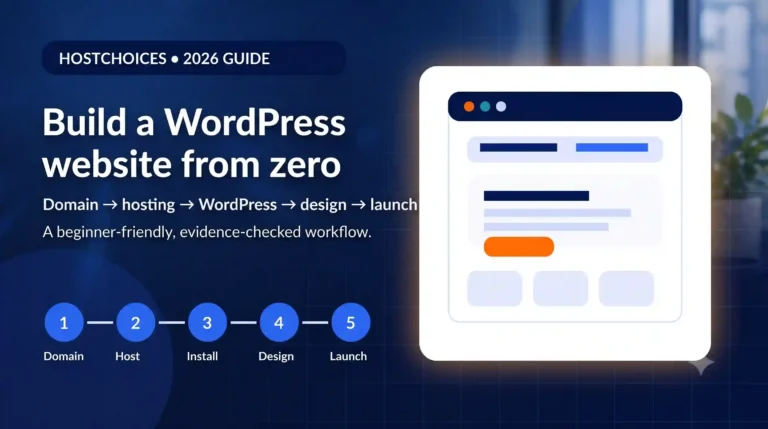
If you want to know how to start a wordpress blog in 2026, the cleanest path is: choose a domain, pick hosting that meets current WordPress requirements, install the current stable WordPress release, set the core options, use a maintained block theme, create only the essential pages and plugins, publish your first post, then run a launch checklist before asking search engines to crawl it. You do not need to code.
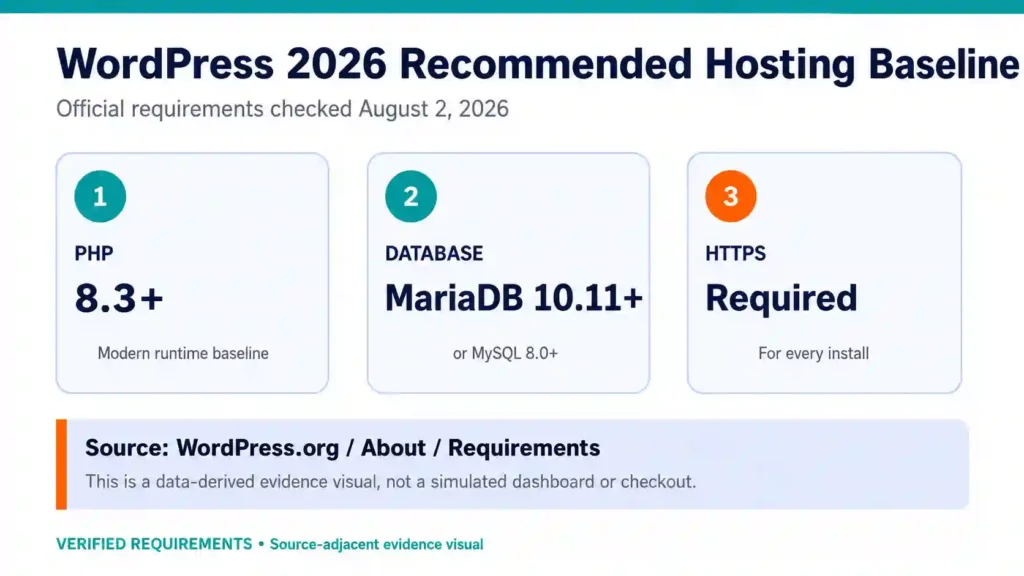
| Current environment lock This guide was fact-checked on August 2, 2026. WordPress 7.0.2 is the current stable security release used as the guide baseline. WordPress.org currently recommends PHP 8.3+, MariaDB 10.11+ or MySQL 8.0+, and HTTPS for every install. Your host may expose a slightly different setup screen, but the WordPress-side settings and verification checks below remain the same. |
Source: WordPress requirements
Start here: time, difficulty, prerequisites, and rollback
| Item | Practical baseline |
| Estimated hands-on time | About 2–4 hours for a simple first launch; DNS propagation can take longer. |
| Difficulty | Beginner. No coding is required for the normal path. |
| Access you need | Domain registrar + hosting account + WordPress administrator login. |
| Platform baseline | WordPress 7.0.2; PHP 8.3+; MariaDB 10.11+ or MySQL 8.0+; HTTPS. |
| Backup prerequisite | Before changing themes/plugins on an existing site, take a restorable backup or use staging. |
| Rollback rule | If a change causes a failure, reverse the most recent change first; restore the last known-good backup when necessary. |
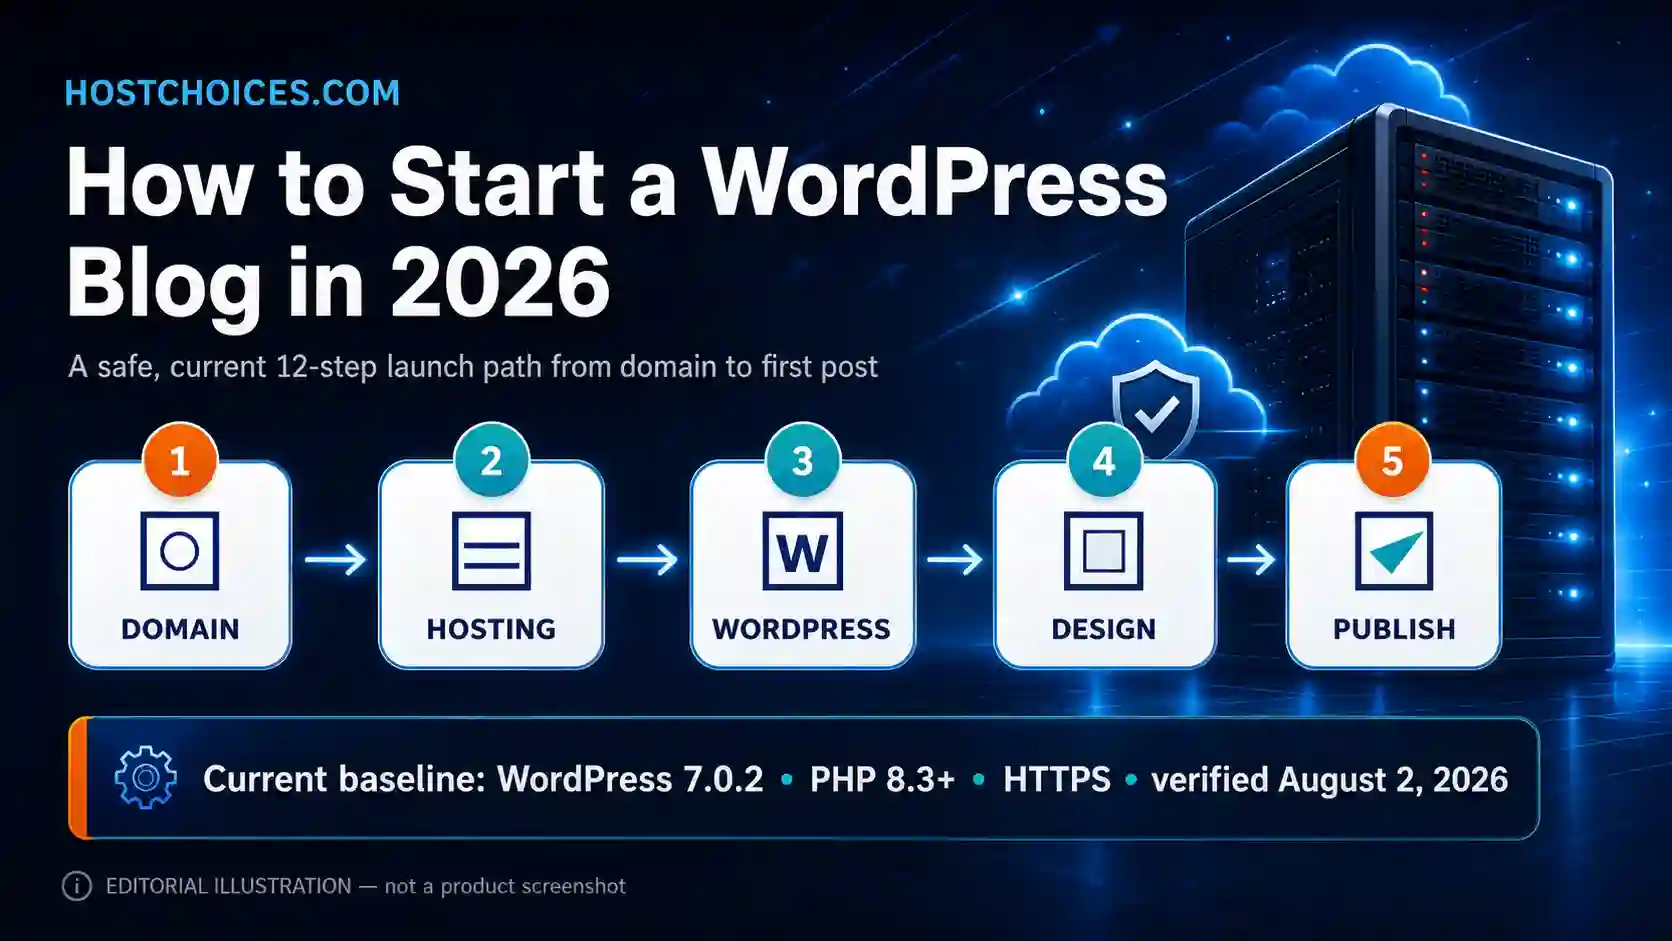
The 12-step launch plan
The sequence matters. Hosting and DNS come before WordPress configuration; WordPress configuration comes before design; design comes before publishing and indexing. That order makes troubleshooting much easier.
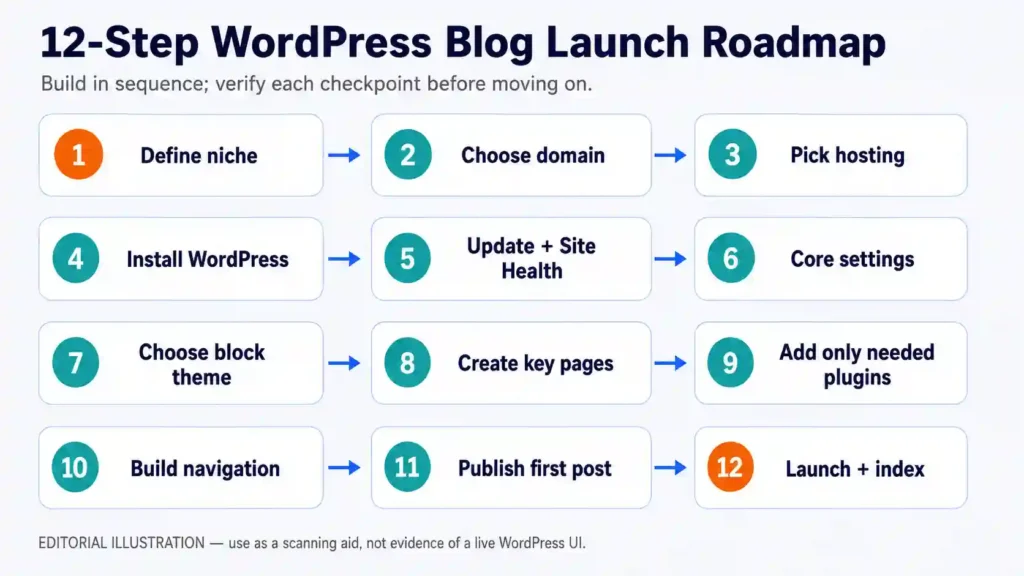
1. Define the blog’s job before you buy anything
Choose one audience and one repeatable problem your blog will solve. A narrow starting promise makes the domain, categories, navigation, and first ten posts easier to decide. You can broaden later; changing a domain after launch is much more disruptive than changing a category.
- Write one sentence: “This blog helps [reader] achieve [outcome] without [main frustration].”
- List 3–5 categories you could realistically publish into for at least six months.
- Draft your first 10 post ideas before registering the domain. If you cannot reach 10 useful ideas, the topic may be too narrow or too vague.
| Expected result You have a one-sentence positioning statement, 3–5 initial categories, and a list of at least 10 article ideas. Nothing technical needs to be purchased yet. |
2. Choose a domain name and WordPress-ready hosting
Your domain is the address; hosting is the server environment that runs WordPress. For a beginner blog, prioritize a current PHP/database stack, HTTPS, backups, straightforward WordPress installation, and support that can help with DNS or SSL problems. Avoid selecting a plan only from the introductory monthly-equivalent price; check the billing term and renewal before checkout.
| Check | Minimum / decision rule | Why it matters |
| PHP | 8.3+ recommended | Current WordPress performance/security baseline. |
| Database | MariaDB 10.11+ or MySQL 8.0+ | Current recommended database baseline. |
| HTTPS | Required | Secure browser connection and modern site baseline. |
| Backups | Restorable, with clear retention | Your fastest rollback after a bad update or plugin conflict. |
| Renewal | Read total due now + renewal term | Prevents a low intro rate from hiding long-term cost. |
If you want a neutral way to narrow providers by budget and technical needs, use the HostChoices hosting recommender. If you want a broader shortlist first, compare the best web hosting providers. These are planned internal links from the ID-118 workbook; this article does not use an affiliate tracking URL because the current affiliate registry contains no ACTIVE link for this brief.
Source: WordPress hosting requirements
| Expected result You own the domain and have a hosting account that meets the current WordPress baseline. Keep the registrar and hosting login details in a secure password manager. |
3. Connect the domain, then confirm HTTPS before building
Your host or registrar will give you DNS instructions, typically nameservers or specific DNS records. Apply the exact values shown by the service that will host the site. DNS changes can propagate gradually, so avoid making multiple contradictory edits while you wait.
- Open the domain in a private/incognito browser. It should resolve to the intended hosting account or temporary site.
- Confirm the final URL loads with https:// and does not show a certificate warning.
- If the site works on one network but not another, allow more propagation time before changing WordPress settings.
| Rollback / safety If DNS stops resolving, restore the previous DNS values from the registrar history or your saved record. DNS is separate from WordPress content, so do not reinstall WordPress to solve a DNS-only problem. |
4. Install WordPress — use the host installer unless you need manual control
Most mainstream hosts provide a one-click or guided WordPress installer. That is the simplest beginner path. If you must install manually, WordPress’s official process is to download the package, create a database and database user, configure wp-config.php, upload the files, and run the install script. Do not follow an old tutorial that asks you to install an outdated WordPress zip.
- 1. Open the hosting control panel and start its WordPress installer, or use the official manual installation procedure.
- 2. Choose the intended domain and HTTPS URL.
- 3. Create a unique administrator username and a strong password. Do not use a shared admin login.
- 4. Finish the install and sign in at your WordPress administration URL.
| Expected result You can sign in to the WordPress Dashboard and the public site loads over HTTPS. If the host installed an older release, update WordPress before customization. |
Source: Official WordPress installation guide
5. Update WordPress and verify Site Health before adding plugins
WordPress 7.0.2 was released July 17, 2026 as a security release, and WordPress.org recommends updating immediately. On a new site, update core before you layer themes and plugins on top. Then open Tools > Site Health and resolve critical issues before launch.
- Dashboard > Updates: confirm WordPress is current.
- Tools > Site Health: review critical items first, then recommended improvements.
- Confirm the site still loads on both desktop and mobile after the update.
| Verification The dashboard reports the current core version, the front end still loads, and Site Health has no unresolved critical issue that would block a new launch. |
Source: WordPress 7.0.2 security release
Source: WordPress Site Health
6. Set the core blog settings before writing content
Set these once now so you do not have to clean up avoidable inconsistencies later.
| Location | What to set | Verification |
| Settings > General | Site title, admin email, language, timezone | Save; re-open the screen and confirm values persisted. |
| Settings > Permalinks | For most blogs, Post name is a clean default | Open a sample post URL after saving; confirm it loads. |
| Settings > Reading | Choose latest posts or a static homepage | Visit the public home page and confirm the intended layout. |
| Settings > Discussion | Choose comment moderation rules | Submit a test comment only if comments are enabled. |
| Settings > Privacy | Create/select the privacy policy page | Open the page from the public site and customize it for your actual data practices. |
| Important search-visibility check: if “Discourage search engines from indexing this site” was used during setup, clear it when the site is ready to launch. WordPress notes that this setting is a request to search engines, not an access-control mechanism. |
Source: General Settings
Source: Permalinks Settings
Source: Reading Settings
7. Choose one maintained block theme and customize it in the Site Editor
For a new beginner blog, a maintained block theme gives you the current WordPress site-editing workflow. WordPress.org documents that the Site Editor is available only when a block theme is active; after activation, open Appearance > Editor to manage Styles, Navigation, Pages, Templates, and Patterns.
- 1. Go to Appearance > Themes > Add New and filter/browse block themes.
- 2. Install and activate one maintained theme. Avoid installing several themes “just to test” on the live site.
- 3. Open Appearance > Editor. Set typography, colors, header, footer, and navigation with the Site Editor.
- 4. Preview the home page, a post, a page, a category/archive, and the mobile layout before publishing design changes.
| Expected result The active theme is a block theme; Appearance > Editor is available; the blog has a readable header, navigation, content width, and footer on mobile and desktop. |
Source: WordPress Site Editor documentation
Source: WordPress block themes
8. Create the essential pages before the first public post
A basic blog can launch with a small number of complete pages. Do not delay publishing because you think you need a 20-page corporate site.
- About: who the site helps, what readers can expect, and who is responsible for the content.
- Contact: a working method for readers to reach you. Test it from a logged-out browser.
- Privacy policy: tailor the page to the analytics, forms, advertising, cookies, email, and third-party services you actually use.
- Optional disclosure page: add it if you use affiliate links, sponsorships, free products, or other material relationships.
| Verification Every page opens from the public site, the contact method works, and the footer/navigation contains only links that are useful to readers. |
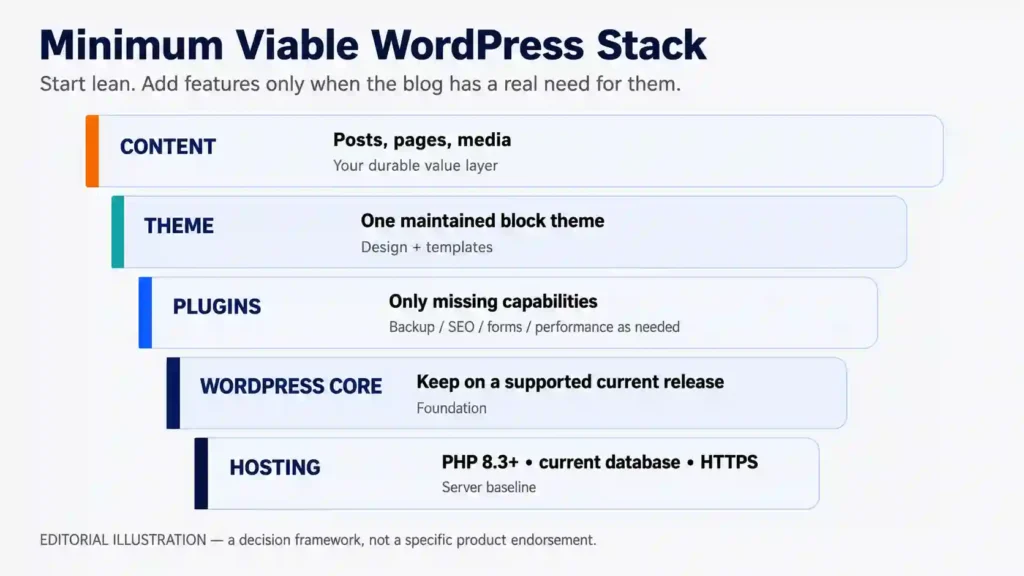
9. Install only the plugins that solve a real requirement
Plugin count is not a useful quality metric by itself; plugin necessity and maintenance matter more. Start with the smallest stack that fills gaps not already handled by WordPress or your host. Typical needs may include backup, SEO controls, a contact form, security hardening, or performance/caching — but your host may already provide some of these functions.
- Install from Plugins > Add New or from a trusted vendor package.
- Check compatibility, maintenance activity, documentation, and whether the feature duplicates something already provided.
- Activate one plugin at a time and check the public site after each material change.
- Delete plugins you decide not to use; inactive code still requires maintenance awareness.
| Rollback If a problem starts immediately after a plugin change, reverse that change first. If you cannot access wp-admin, use the host’s file manager/support path or restore the last known-good backup rather than making multiple unrelated changes. |
Source: WordPress plugins — add/manage
Source: WordPress hardening guidance
10. Build a simple category and navigation structure
Use the 3–5 categories you defined in Step 1. Categories should represent recurring editorial lanes, not one-off keywords. For a block theme, you can manage navigation through the Site Editor. Keep the primary menu short enough to scan on a phone.
- Home
- Your 3–5 main categories or a single Blog link
- About
- Contact
- Optional: a Resources or Start Here page only when it has real content
Source: Site Editor navigation
11. Write and publish the first post in the Block Editor
Open Posts > Add New. Use one clear H1/title, then structure the body with useful H2/H3 headings, short paragraphs, lists, images with descriptive alt text, and links that help the reader take the next step. The Block Editor is designed to build content from blocks, so you do not need HTML for a normal post.
- 1. Write the title and a direct opening that answers the post’s main question.
- 2. Use headings to reflect the real decision or task sequence; do not insert headings only for keyword repetition.
- 3. Add relevant media, descriptive alt text, and internal/external links.
- 4. Preview on desktop and mobile. Fix long headings, oversized images, and broken links.
- 5. Publish, then open the public URL in a logged-out private window.
| Expected result The public post loads over HTTPS, has one clear title, readable spacing on mobile, working links, useful alt text, and no editor-only placeholders. |
Source: WordPress Block Editor overview
12. Run the launch checklist, then help search engines discover the site
Publishing is not the last step. Verify the site as a visitor and as an administrator, then submit the site to your search tools.
| Launch check | Pass condition | If it fails |
| HTTPS | No browser certificate warning | Fix SSL/DNS with host before promotion. |
| Mobile layout | Header, body, tables, forms are usable | Simplify layout or theme styles. |
| Contact | Test message arrives | Check form/mail delivery configuration. |
| Backup | A recent backup exists and restore path is known | Enable/verify backup before more changes. |
| Site Health | No launch-blocking critical issue | Resolve critical item before scaling traffic. |
| Permalinks | Post URLs resolve | Revisit Settings > Permalinks / host rewrite support. |
| Search visibility | Indexing is not discouraged at launch | Correct Reading setting. |
| Sitemap / discovery | Sitemap is available and submitted where appropriate | Use Search Console sitemap tools. |
For a few important new URLs, Google documents the URL Inspection tool as the way to request a crawl; for many URLs, submit a sitemap. A crawl request does not guarantee immediate indexing, so treat indexing as a process rather than a launch-day promise.
Source: Google: request recrawl / URL Inspection
Source: Google: build and submit a sitemap
| Launch complete Your blog is live, secure over HTTPS, backed up, configured, mobile-readable, and ready for a repeatable publishing workflow. The next goal is not more setup — it is consistently useful content. |
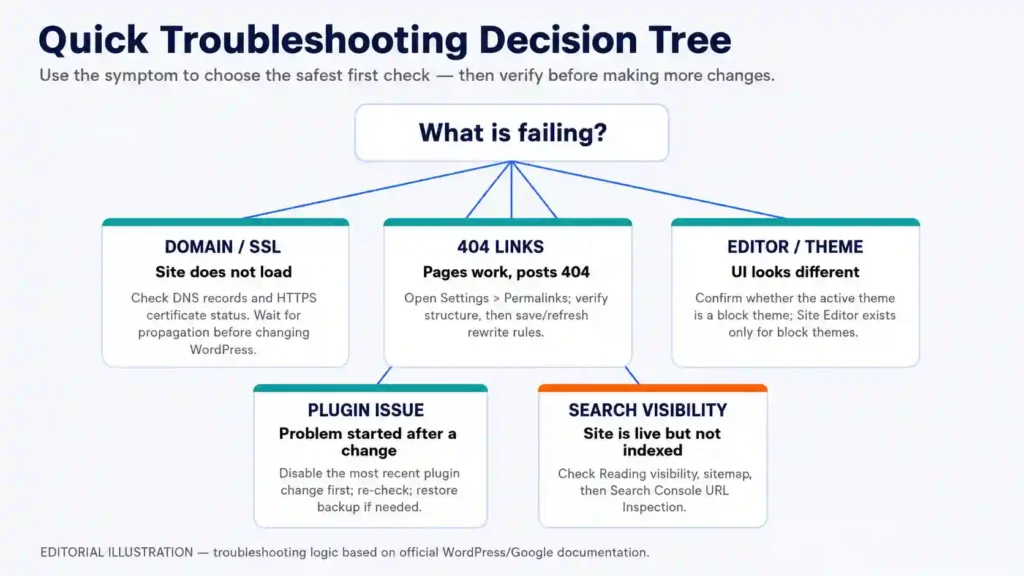
Common problems and the safest first fix
| Symptom | Likely first check | What not to do |
| Domain does not load | DNS values + propagation + host destination | Do not reinstall WordPress to fix DNS. |
| HTTPS warning | Certificate status and final domain mapping | Do not publish login/forms over plain HTTP. |
| Posts return 404 | Settings > Permalinks and rewrite support | Do not change every plugin/theme at once. |
| Appearance > Editor is missing | Confirm the active theme is a block theme | Do not assume every theme uses the Site Editor. |
| Site breaks after plugin/theme change | Reverse the most recent change; restore backup if needed | Do not stack more changes before isolating the cause. |
| Page is live but not indexed | Reading visibility, sitemap, Search Console URL Inspection | Do not repeatedly request indexing as a substitute for useful content. |
Rollback and recovery plan
A beginner-friendly workflow should make failure reversible. Before a major theme/plugin change, create a restorable backup or use staging. If a change causes a problem, identify the last change, reverse it, and verify the site before doing anything else. If the dashboard is inaccessible, use your host’s file manager, staging/backup tools, or support channel. Avoid editing production theme/plugin files as a first troubleshooting step.
- Restore point: know where the last good backup is and how to restore it.
- One-change rule: troubleshoot one variable at a time.
- Verification: after rollback, test home page, one post, login, form, and HTTPS.
- Escalation: if the issue involves DNS, SSL, database access, or server errors, use the host’s support channel with the exact error and time observed.
What to do in the first 7 days after launch
- Publish 2–3 genuinely useful posts that fit your core categories; quality and consistency matter more than filling the site with thin posts.
- Add contextual internal links between related posts as the library grows.
- Review Search Console for crawl/indexing issues, but do not overreact to day-one data.
- Measure page experience and fix obvious mobile, image-size, and navigation problems before adding more design complexity.
- Document your repeatable workflow: draft → edit → preview → publish → verify → update.
Frequently asked questions
Is WordPress itself free?
The open-source WordPress software can be downloaded without a software license fee. A self-hosted blog still needs a domain and hosting, and you may choose paid themes, plugins, email services, or other tools.
Do I need coding skills to start a WordPress blog?
No. The normal beginner path uses the WordPress Dashboard, Block Editor, and — with a block theme — the Site Editor. Coding becomes optional for advanced customization, not a prerequisite for publishing.
How long does it take to start?
A simple site can be configured in a few hours, but domain/SSL propagation and the time you spend on design or content can extend the process. Treat “30-minute blog” claims as best-case setup marketing, not a universal project estimate.
How many plugins should a new blog install?
There is no ideal count. Install the smallest number that supplies capabilities you actually need, avoid duplicate features, and keep every installed component maintained and updated.